

Installing a Radiant Cycles Shorty GP Exhaust: How to Guide
Upgrading your motorcycle’s exhaust system can significantly improve its performance, sound, and overall appearance. The Radiant Cycles Shorty GP Exhaust is a popular choice among motorcycle enthusiasts who want to enhance the look and sound of their bike. This exhaust system is affordable, easy to install, and offers a noticeable improvement in horsepower and torque. In this how-to guide, we will walk you through the step-by-step process of installing a Radiant Cycles Shorty GP Exhaust on your motorcycle.
Before you start the installation process, make sure you have all the necessary tools and equipment. You will need a socket wrench, a torque wrench, a pair of pliers, a screwdriver, and a rubber mallet. You should also have a new exhaust gasket and some high-temperature silicone sealant on hand read more on Radiant Cycles.
Remove the old Exhaust System
The first step in installing a Radiant Cycles Shorty GP Exhaust is to remove the old exhaust system. This may involve removing the heat shields, the muffler, and the header pipes. Start by loosening the clamp that connects the header pipes to the engine. Use a socket wrench to remove the bolts that hold the muffler and the heat shields in place. Once all the bolts are removed, you can slide the old exhaust system off the motorcycle.
Install the New Header Pipes
Once the old exhaust system is removed, you can start installing the new Radiant Cycles Shorty GP Exhaust. Start by installing the new header pipes. These pipes are designed to fit directly onto the engine and are held in place with a clamp. Use a socket wrench to tighten the clamp and ensure that the pipes are securely attached to the engine.
Install the New Muffler
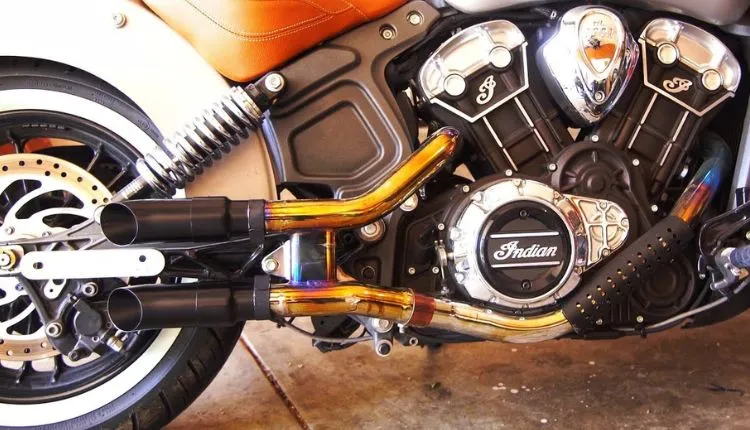
Next, you will need to install the new muffler. The Radiant Cycles Shorty GP Exhaust comes with a slip-on muffler that is designed to fit directly onto the new header pipes. Slide the muffler onto the header pipes and use a rubber mallet to ensure a tight fit. Use a torque wrench to tighten the bolts that hold the muffler in place.
Install the New Heat Shields
The Radiant Cycles Shorty GP Exhaust also comes with new heat shields that are designed to fit over the header pipes and muffler. These heat shields help to protect the rider and passenger from the heat generated by the exhaust system. Install the heat shields by sliding them over the header pipes and muffler and securing them in place with the bolts provided.
Reconnect the O2 Sensors
If your motorcycle is equipped with O2 sensors, you will need to reconnect them to the new exhaust system. The O2 sensors are located near the engine and are connected to the header pipes. Use a pair of pliers to disconnect the O2 sensors from the old exhaust system and reconnect them to the new header pipes.
Install the new exhaust Gasket
Before you can start the motorcycle with the new exhaust system, you will need to install a new exhaust gasket. The exhaust gasket is a small, circular seal that sits between the header pipes and the engine. This gasket helps to prevent exhaust leaks and ensures that the exhaust system operates efficiently. Install the new exhaust gasket by sliding it over the new header pipes and aligning it with the engine.
Apply high-temperature silicone Sealant
To ensure a tight seal and prevent exhaust leaks, it is recommended to apply a small amount of high-temperature silicone sealant to the exhaust gasket. This sealant is designed to withstand high temperatures and will help to keep the exhaust system operating at peak performance.
You may also like

How to Choose a Pickup Truck in Toronto
When it comes to choosing the right pickup truck for Toronto living, there are a lot of factors to c

Top Quality Tesla Model Y Accessories
Whether you’re looking to add some extra storage, upgrade your vehicle’s aesthetic or im

The Demand for Truck Driver Jobs
One of the main objectives of people who want outdoor jobs is the adventures one can have, which are