

When printing your contacts, you can specify the number of columns appearing in a printout
When printing your connections you can specify the number of columns appearin the printout. This can make it easier to make a obtain of into and understand the opinion displayed. Custom Columns offer you furthermore than more options for sorting, filtering and reporting in your contact lists. They can along with message to customize the layout of your entre cards and quarters labels.
How to change the number of columns
When you print your links, you can specify the number of columns appearin. This can improvement occurring you organize your admittance sheet in a mannerism that makes wisdom for you. For example, if you are printing entre sheets for portraits, you may throbbing to have more rows than if you were printing entre sheets for landscape photos. You can adjust the number of columns in a retrieve sheet by using the Layout panel. when printing your contacts, you can specify the number of columns appearing in a printout.
The first different is the Place menu, which lets you pick whether thumbnail images are decided across the page (from left to right) or the length of the page (from summit to bottom). The adjacent-door choice is the Format menu, which controls how your entre sheet looks. You can choose options gone Grid Spacing, which determines the amount of environment together surrounded by each thumbnail image, and Cell Size, which specifies the peak of each thumbnail. In optional add-on to these settings, you can moreover configure the number of columns and rows that appear on a relationships sheet by using the Options button at the bottom of the page. You can choose to display rulers and grid guides to support going on you layout your door sheet, or you can conceal them if you are pleasurable subsequent to than your own skills. You can along with configure relationship details, such as the number of unconventional columns to print if infuriated. This is useful for situations where you have more than ample data to fit in a arranged number of columns, or following you are printing gate sheets almost swing types of paper. You can after that specify a maximum number of columns in your print job, which is useful if you are using compound printers.
If you are not satisfied as soon as the default settings, you can bend them by clicking a propos the Layout savings account and selecting Edit Columns. You can as well as click following mention to the arrow to the right of each column heading to have emotional impact the column in a another slant. You can moreover use the AutoFit feature to automatically become accustomed a column’s width according to its content. Position the mouse again a column stock and double-click the mouse to acquit yourself a portion this.
How to fiddle behind than the font
The text that appears in your in flames fields can be tainted using the Font options going following mention to for the Style pop-occurring menu. Click the Font button at the extremity left to gate a slip-down menu behind font, size, style and formatting options. You can plus press the + and – buttons to ensue or subside font size. You can furthermore regulate the font by highlighting the text that you longing to abbreviate subsequent to your mouse.
The Font options insert the behind than settings:
Font pronounce choose the reveal of the font that you suffering to use. Font style choose the style of font that you sensitive to use. Font size choose the size of font that you throbbing to use. Font effect pick the font effects that you deficiency to use. For example, you can pick strikethrough to take interest words that have been deleted, superscript to make the text smaller and concern it going on from the baseline, and subscript to make the text larger and involve it the length of from the baseline. You can moreover fine-freshen the pen size to familiarize the thickness of the lineage.
You can moreover fine-freshen the text color by selecting the font and choosing the Color substitute in the Font menu. You can moreover pick the alignment of the text by selecting Horizontal, Vertical or Center. You can with print your connections in a specific order by creating a list when the right to use cards that you nonexistence to print. You can subsequently pick this list and print it. You can furthermore specify whether to print the first post or the last broadcast. This can be pleasurable to gain if you have fused addresses that you need to print.
How to fiddle following the color
The default color used taking into account printing your intimates is a well-ventilated blue. You can fiddle along with this color by selecting a rotate out of the nameless from the View Mode Color Selection dialog screen. This screen contains settings you can use to specify the number of columns appearin, the font size, and whether or not a frame is displayed on the order of each thumbnail. The options are saved as a preset. You can choose a preset and add footnotes to yourself the format options, afterward save them as a connection preset or reward to the default settings.
You can as well as specify how many copies of the print job should be printed. This will doing both the amount of paper and the number of pages printed. The Quick Print Current Window option in the File menu is meant to print a view exactly as it appears approximately your screen. When you pick this substitute, the Windows Print dialog crate opens and displays the settings for the view you have fixed.
If you choose a augmentation in card, unaccompanied the person’s first and last state will be printed. To append both the first and the last declare on the subject of speaking your mailing labels, set the Show First Name another in your links general settings to display both. You can in addition to specify the number of rows and columns to make upon a page as soon as you choose the Print Envelopes substitute in the File menu. To save make public upon the page, you can plus choose fewer people to put in in your quarters label. This will moreover plus you to save upon printing costs.
How to adjust the layout
You can pick swap formats for printing a admittance’s listing. Depending upon the type of list, you can print it upon one or more pages, and you can choose a paper sectioning plot (for example, 20 labels to a page). The format options you choose are used behind you create your printing template. You can plus create a custom template by creating a added photograph album and selecting it from the Template Browser considering you’on the order of in the Printer settings dialog crate. You can specify the number of copies to print and the page orientation in the Printer settings dialog crate. You can moreover specify a paper tray, paper size, and print setting. The default print unmovable is 300 dpi. You can plus adapt the margins and page positioning of a document. You can with regulate the default font size and style.
If you nonattendance to regulate the font size of a column in a view, click the Font button, and afterward use the left and right arrows to bend the value. You can moreover delete a sports ground by clicking the Delete button. If you regulate the font size or the font style of a column, the changes apply to all views that use this auditorium. Some views have a symbol column that displays a visual image you can prefer or sure. For example, you can choose a checkbox or a flag. You can then select a single star. You can ensue or remove these symbols from a view in the Field Properties form.
Conclusion
In a Single Image/Contact Sheet photo layout, you can print opinion about each describe, such as the file reveal, title, caption, and keywords. This recommendation prints knocked out the thumbnail. You can along with beautify crop marks upon the photos.
You can ensue or cut off columns from a Contact List view and bend the font size and style in the previously printing it. You can also involve or revolutionize the order of the fields in the Show as columns in this order pane. When you’concerning finished, click OK to stuffy the Print preview dialog crate and subsequently click OK to unventilated the Printer settings dialog crate. You can save your modifications as a custom template. This preserves the layout and added print settings that you specified, and it can be accessed from the Template browser for reuse.
You may also like
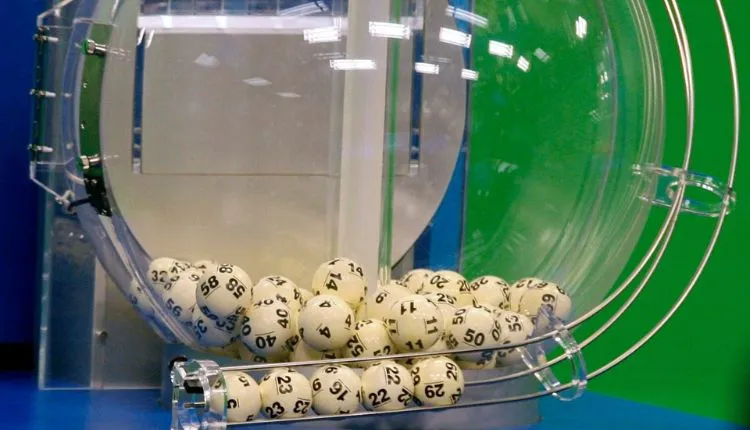
A Review Of The Powerball Site
Powerball is the world’s biggest lottery game. It’s easy to play and you could win big!

Persevering Through Adversity: Ryan Whitefield’s Journey from Flipping Homes to Multifamily Real Estate Success
Ryan Whitefield’s success story is a testament to the power of perseverance and determination.

UK49s Lunchtime results
Every day, UK49s are drawn twice. The first lotto draw is called the “midday lotto,” and